Covering up the moon
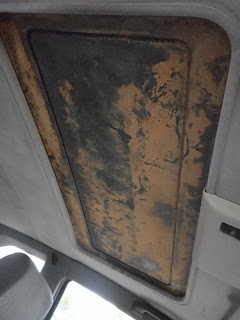
My moonroof was a a bit naked and not the prettiest so decided to have a bash at sorting it out.
This is one of those jobs that you really don't want to do as it opens up a world of horror stories as you go digging but it needed doing.First I found as close a match to the fabric as I could on ebay. The stuff i found was a good colour match however it is not flocked carpet but perforated fabric. This could actually be a good thing as it will be less likely to bind when the moon roof is opened and still has the needed insulting foam backing the same as the original.
Removing the roof is pretty easy if you follow the manual and take your time. There are a fair few bits you can break so I was careful.
Once out I spent a good while completely cleaning out the cavity and restoring paint finish where it was lacking. It was actually pretty good up there which was good news as these are usually a problem area.
Once I was happy with the state of everything I lubricated the cables and tracks with white grease. any other moving parts got some WD40 light oil to help them along. Damn, I'm out of jobs to do that aren't recovering that moon roof...
Now to that moon roof. Incidentally it is called a moon roof and not a sunroof because it is not glass. Well that's what I was lead to believe.
Everything needed cleaning back to paint as best as possible. Any areas of missing paint would need treating and repainting even if you can't see it. Thankfully mine was fine.
 I laid the fabric over the inner panel of the moon roof and marked out the rough shape, I then cut it out and offered it back up to the panel where all looked good so far.
Next up I dug out some contact adhesive and buttered up the surface of the centre panel. The I did the same to the fabric but very sparingly so it didn't soak through the foam into the fabric where it would mark and leave hard areas.
Once the adhesive had partially gone off I offered the two pieces up to one another starting on the front edge and working back. As the fabric is permeable, bubbles aren't a huge issue but wrinkles are and you only really get one go at this before you have to start again. Once laid down I then applied clamps to edges and corners and trimmed any excess fabric off so there would be nothing to catch when the moon roof is operated. then I applied roughly 1 million pegs to the edges. this helped bind these areas closely and maintain the shape.
This was left over night to set. The following day the pegs were removed, it took a few days for the peg marks to fade, most importantly though, the fabric was secure.
The same process was carried out on the outside. This is a much more tricky shape so requires a staged approach to glueing. I did the bulk of it in one go then one edge at a time to get a tidy edge inside and out.
Quite a bit of effort but the end result is really worth it. Still slow as sin to open though.


Comments
Post a Comment