Posts

Exhausting

Image
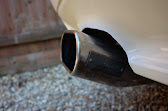
  The exhaust has been winding me up for a while. I don't really like the flick up style tip despite it being a period cool mod. I also do not like the way it likes to fall apart at random when I am driving it or at the very least blowing at any given opportunity. A few attempts to remedy this hadn't gone far enough so it was time to drop the lot and start again. So on jacks the car went again and back under the car I slid. The exhaust was removed from the resonator back, cleaned and reassembled. During the time I have owned the car I have replaced the last remaining two rubber mounts with new ones of varying designs. Big thick chunky mounts don't really fit over the loops and the rubber rings are a bit long and flimsy. Something more resembling the genuine mounts do a shockingly better job but that varies depending on where in the system I was trying to fit. Disassemble was carried out with a Ryobi rattle gun which made short work of all of the fasteners. The main change I

hold the brakes

Image
 I wouldn't say the brakes were bad but I also had no idea how old they were or what brand anything was so I decided to go upgrading. A bit of time researching got me a list of cars that used the same kit such as early Golfs, Ibizas etc so I went looking for the best I could afford. I got lucky quickly with a set of EBC brake pads for the front and rear NOS. The packaging was beaten up but the all important pads were perfect. EBC make the best pads on the market in my opinion so I was happy with this. Some good quality front and rear drilled and grooved discs were next. This was the first time I had done discs on a car of this age so I wasn't expecting to do bearings as well but I soon found out I was. Well the rears at least. The rears went on fine with new bearings and races. The fronts were a simple drop in but I soon noticed that the new discs were 1mm smaller. I had got the wrong mod state of front disc which was a bit disappointing. I shall order some new ones soon to

second hand car joys

Image
Shortly after changing the wheels it became apparent that there was an issue with the handling on the old Corrado. At first I put it down to cheap tyres but a sudden rear end break out at only moderate speed made me wonder if something else was up. I was actually concerned that the back end of the car wasn't even bolted on properly but a few shoves on all of the corners just gave a slight wallow that could even be said to be good for a car of this age. So up it went on jacks and I took a look underneath. I was under the understanding that the shocks had been recently serviced with replacement lowering springs so didn't think it was likely to be a shock issue. After a false start with loose appearing top hats at the front (turns out they just do that, poking out the top), I went to the back where I spotted that the rear beam bushes did not look very healthy. I thought things were worse than they actually were but seeing the design of the new replacements, things prob

Not so super charger

Image
it had been about 6000 miles since its last rebuild and with forums throwing up anything from 8000 down to 3000 miles between rebuilds, I descided mibe needed looking at. The supercharger had developed a bit of a squeal which hastened my need to take a look so a service kit was ordered and the supercharger hoyed out. First up I disconnected the inlets then hit the issue of taking the tension off of the belt. After a bit of hunting about I found out my caulking gun was perfect for the job. With the belt loosened and moved out of the way I could pop off the bolts on the left side quite easily. The headlamp needs removing to access the oil lines which isn't a hard job either once access is gained. The worst bit for access for me was getting to the right hand side. The resonator box has has a rubber hose and clamp coming out of it, that bit was fine, and three bolts holding it together. The captive nut on all three just spun so they were going nowhere without making a mess. So

Covering up the moon

Image
My moonroof was a a bit naked and not the prettiest so decided to have a bash at sorting it out. This is one of those jobs that you really don't want to do as it opens up a world of horror stories as you go digging but it needed doing. First I found as close a match to the fabric as I could on ebay. The stuff i found was a good colour match however it is not flocked carpet but perforated fabric. This could actually be a good thing as it will be less likely to bind when the moon roof is opened and still has the needed insulting foam backing the same as the original. Removing the roof is pretty easy if you follow the manual and take your time. There are a fair few bits you can break so I was careful. Once out I spent a good while completely cleaning out the cavity and restoring paint finish where it was lacking. It was actually pretty good up there which was good news as these are usually a problem area. Once I was happy with the state of everything I lubricated the cables a

Holy car

Image
During the MOT the plucky inspector drove a scribe through the floor of the car which seemed a bit unfair. It did however prove I had a patch of rust to sort and fairly quickly if I wanted an MOT retest. This was a bit of a surprise as the car is pretty solid otherwise but also unsurprising when you consider the cars age and the location; just aft of the drivers B pillar inside the sill. Obviously I didn't photograph it at the beginning, that would be sensible to document but really there wasn't a lot to see. The whole lot was sealed up nicely but moisture had clearly got to the surface from the inside. I took a die grinder to the hole and cut out all of the rusted through material which took me to a rubber plug and forward a couple of centimetres.  I cut back the protective coating a bit further than the hole then got a wire brush into it to clean it all back to shiny steel. I am a big believer in repairing to 110% the original strength so decided to reinforce the

Rolling mods

Image
The first thing I wanted to change was the wheels. The BK racing whees that came on the car didn't look bad but they looked a little too gangley on this car for me and she needed something smaller. I wanted to go for some factory fit wheels to keep the car as original as I could.  The standard factory wheels would have been 16 spoke 4 studs but thankfully VW did offer some factory options which I could consider: BBS RM BBS RZ The RM looks far nicer but the cost was also exponentially more. I couldnt justify £1000 for a clean set of RM's and restoring some of the more affordable options was going to be expensive so I was going to settle for some RZ's when a set of BBS RM copies came up with rubber for not a lot of money. They weren't perfect but they would do the job for now. They were removed from a Golf Mk2 so had the correct spacers and bolts already. I opted for some new bolts anyway and quickly had then fitted to the Corrado once I