Holy car
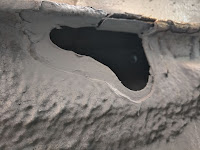
During the MOT the plucky inspector drove a scribe through the floor of the car which seemed a bit unfair.
 It did however prove I had a patch of rust to sort and fairly quickly if I wanted an MOT retest.
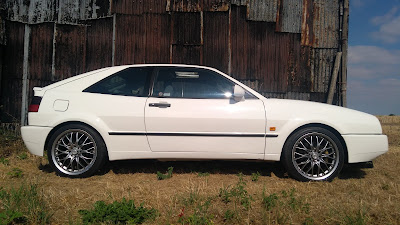
This was a bit of a surprise as the car is pretty solid otherwise but also unsurprising when you consider the cars age and the location; just aft of the drivers B pillar inside the sill.
Obviously I didn't photograph it at the beginning, that would be sensible to document but really there wasn't a lot to see. The whole lot was sealed up nicely but moisture had clearly got to the surface from the inside.
I took a die grinder to the hole and cut out all of the rusted through material which took me to a rubber plug and forward a couple of centimetres.
I cut back the protective coating a bit further than the hole then got a wire brush into it to clean it all back to shiny steel.
I am a big believer in repairing to 110% the original strength so decided to reinforce the sill at the same time which got the same treatment.
Finally I painted everything I could get to on the inside and out with rust converter then zinc primer.
Next I was off into the shed where I dug out some 1.6mm thick steel sheet and shaped it to make a scab patch with the little tab to replace material lost on the sill.
This took a long time to get right with plenty of back and forward till I was happy with the fit.
I did have to expand the area of exposed metal a bit on the car and restore the surface finish as I needed something to weld to.
Once I was completely happy with the shape I finished up the sheet work with a smooth off to all edges and corners then made any bends needed to match the contours of the cars underside.
Next I drilled a hole wherever I had good metal to weld to with the option to edge weld in other areas.
 Before I got carried away with a migatronic mig 161i I thought I would run a quick test piece.
I drilled two holes in some scrap test pieces I had so I could spot welded through them onto another piece of sheet.
The Migatronic just needs to know the thickness of the material and it figures out the rest. a quick squirt from the welder into each hole and I had two perfect spot welds. Easy!
 On the actual car it was a bit less easy. I couldn't weld into the new material so was welding into slightly more suspect metal in the car. Oh and I was upside down, lets not forget that. I did manage to get a bit of a weld into the sill edge too for a bit more strength but I was not going to be pushing my luck here.
I am not entirely sure that the rust preventative primer I was using was completely weld through as I had a lot of trouble getting welds to start but after plenty of persistence and wire trimming I got the job done.
Once cool I could use some body seal to seal up the edges and top off the crapper of the welds.
Then it was a case of sticking on some primer and paint to get it all looking like new again.
I will be throwing some wax oil over the lot soon to further protect the underside of the car but I don't think I did a bad job for my first go on a mig.
With that done, I could throw the car back through the MOT and actually get to enjoy the car finally.
I quite like it really.
Next I was off into the shed where I dug out some 1.6mm thick steel sheet and shaped it to make a scab patch with the little tab to replace material lost on the sill.
This took a long time to get right with plenty of back and forward till I was happy with the fit.
I did have to expand the area of exposed metal a bit on the car and restore the surface finish as I needed something to weld to.
Once I was completely happy with the shape I finished up the sheet work with a smooth off to all edges and corners then made any bends needed to match the contours of the cars underside.
Next I drilled a hole wherever I had good metal to weld to with the option to edge weld in other areas.
 Before I got carried away with a migatronic mig 161i I thought I would run a quick test piece.
I drilled two holes in some scrap test pieces I had so I could spot welded through them onto another piece of sheet.
The Migatronic just needs to know the thickness of the material and it figures out the rest. a quick squirt from the welder into each hole and I had two perfect spot welds. Easy!
 On the actual car it was a bit less easy. I couldn't weld into the new material so was welding into slightly more suspect metal in the car. Oh and I was upside down, lets not forget that. I did manage to get a bit of a weld into the sill edge too for a bit more strength but I was not going to be pushing my luck here.
I am not entirely sure that the rust preventative primer I was using was completely weld through as I had a lot of trouble getting welds to start but after plenty of persistence and wire trimming I got the job done.
Once cool I could use some body seal to seal up the edges and top off the crapper of the welds.
Then it was a case of sticking on some primer and paint to get it all looking like new again.
I will be throwing some wax oil over the lot soon to further protect the underside of the car but I don't think I did a bad job for my first go on a mig.
With that done, I could throw the car back through the MOT and actually get to enjoy the car finally.
I quite like it really.


Comments
Post a Comment